Any application involving press-force and positioning benefits greatly from in-process monitoring & gauging, which ensures that the products have been assembled properly in order that they will function properly in the hands of your customers. Effectively evaluating the generated press-fit curve is key.
Firstly, the characteristics of the data curve of a good component must be determined. This can be calculated theoretically by the engineers involved, and adjusted as more data becomes available, or it may be determined with the use of a master, or known-good, component, which is used to generate an ideal data curve against which future components are gauged. In the absence of a master component, an ideal curve can be generated by running several acceptable components and using their data to calculate averages, as well as acceptable highs and lows.
The software, such as that which is part of every Promess system, is used to set up limits and evaluate all future-generated curves against the ideal.
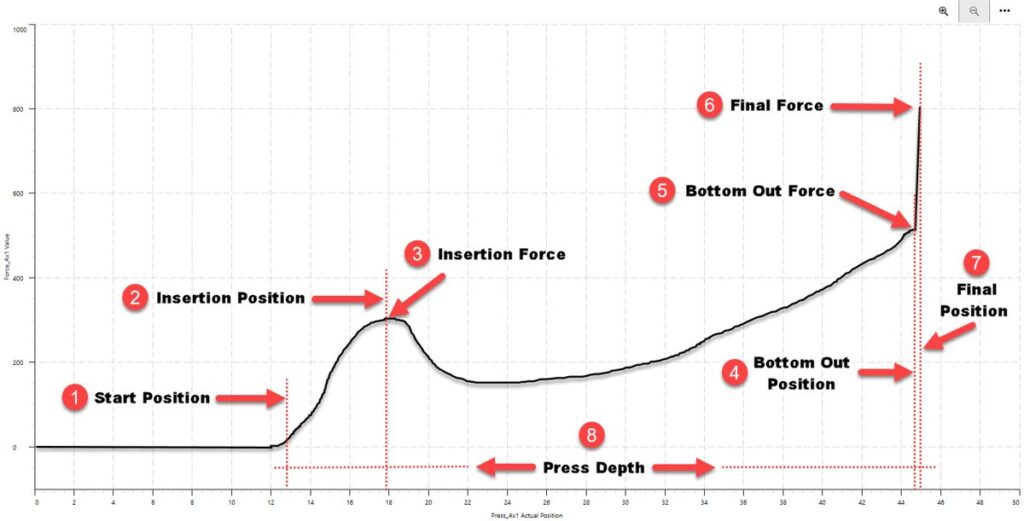
Press-Fit Curve: Pressing to a Hard Stop
In many automotive applications, simply pressing to a hard stop is sufficient. These applications include pressing in bushings & bearings, pressing on and seating clips & other fasteners, as well as countless others.
The graph in Figure 1 shows the key characteristics captured in the press-fit curve.

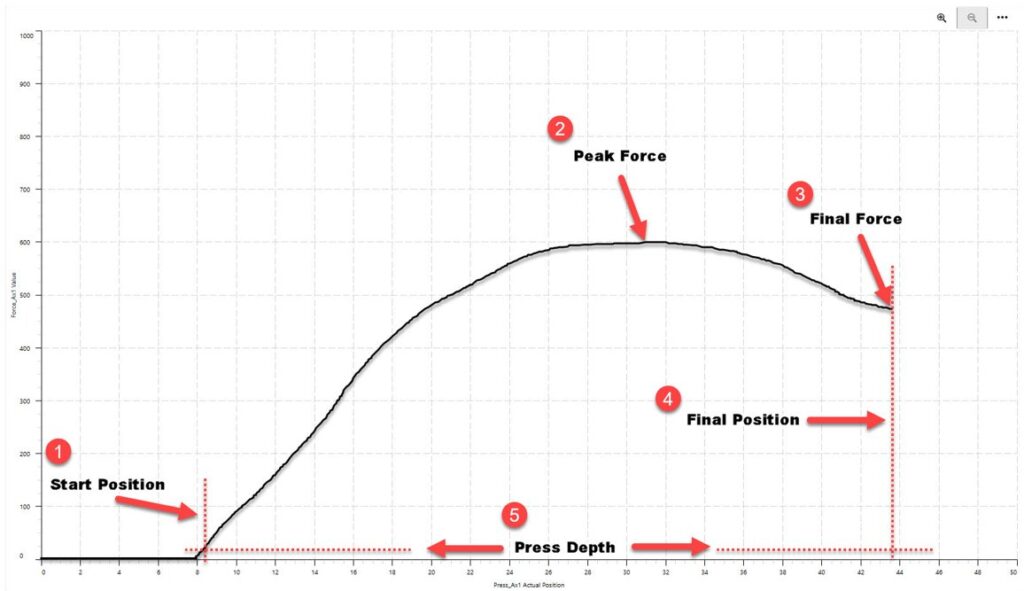
Press-Fit Curve: Pressing to a Position
In other applications, for both automotive and medical, stakes can be higher. If there are added levels of regulation, as well as requirements for verification data and traceability, simply pressing to a hard stop is not an option. In many instances, pressing to a position, whether absolute or relative, is required.
The graph in Figure 2 shows the key characteristics captures in the data curve.

In other industries, as well as Medical & Automotive, there are many applications that benefit greatly from having the ability to generate in-process data and evaluate the curves produced. Some other examples include, but are not limited to:
- Crimping
- Staking
- Pressing to an External Transducer
- Riveting
- Forming
- Spring Testing
- Bending & Straightening

Pressing Bearings Application
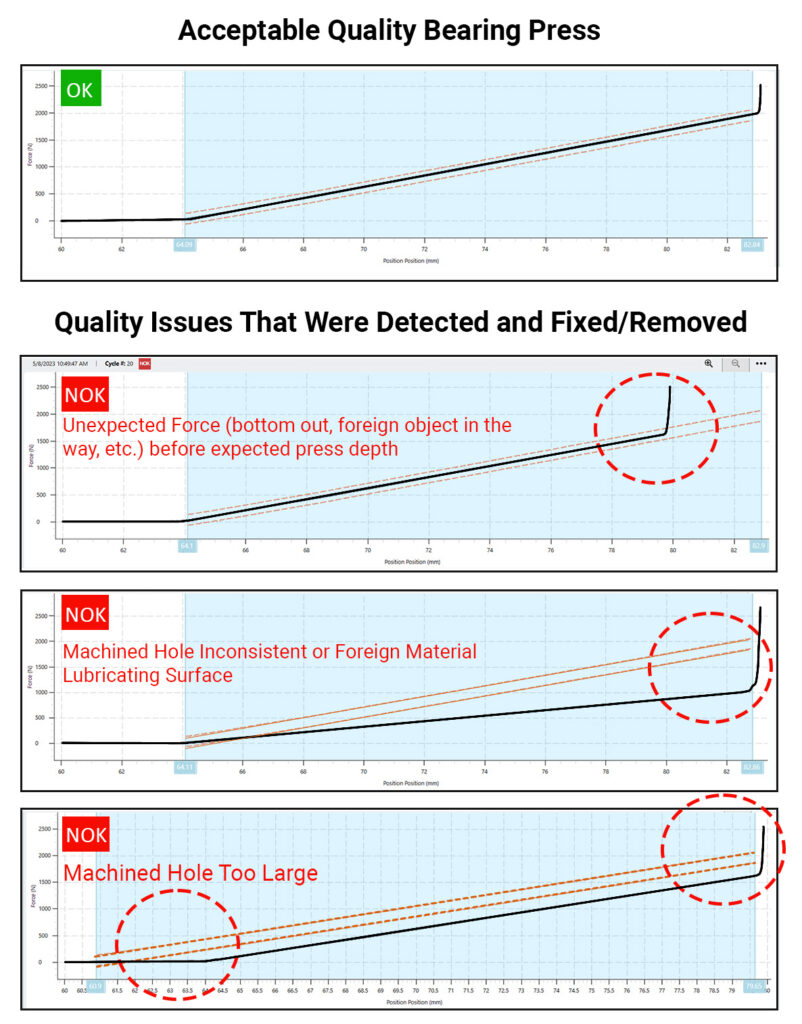
One manufacturer who was pressing bearings into pre-machined holes was experiencing incoming quality issues. The pre-machined holes, which came from one of their vendors, had a lot of variation. Some of the poorly assembled components were not caught before being shipped out to their customers, resulting in recalls, damage to their reputation, and tremendous expense. Figure 3 demonstrates the different curves displayed depending on the part.
Upgrading their system to one capable of effectively evaluating their press fit curve solved the problem by verifying quality in-station, while the suspect assemblies could still be fixed or removed, before they caused further headaches down the line, and long before they caused problems for the customer or end-user.
In the instance of the Bearing Press, and in countless other applications, simply using a press system capable of in-process monitoring & gauging solved the problem, not only of evaluating press-fit, but more importantly, kept bad assemblies away from customers, saving the manufacturer their reputation, as well as a whole lot of unnecessary expense.
Learn more about the Promess UltraPRO Software
Learn more about the Promess Electric Servo Press
