“No Fault Forward” means that mistakes should be caught when and where they happen and not somewhere downstream in the process. If that idea sounds familiar there is a good reason.
By: Glenn Nausley, President, Promess, Inc
Making perfect parts and assemblies every time has been the goal of the manufacturing industries since day one. Substituting one buzz phrase for another does not change that reality. Perfection, of course, is an impossible goal. But, today detecting “bad” parts or assemblies and keeping them out of the process most definitely is not.
The key to achieving that goal is combining sensors, servo technology and specialized software. This combination makes the station capable of detecting bad parts and assemblies in real-time. Literally while they are being made. My company, Promess, has been providing this kind of in-process monitoring solutions to customers for more than 35 years. We help them achieve “No Fault Forward” results long before that phrase was attached to the idea.
In-Process Monitoring
The key to in process monitoring is to design the station or process with the correct feedback to allow the machine to measure the process performance in real-time. This doesn’t just happen by accident. It requires process feedback parameters to be thoroughly analyzed before the process is finalized and the system is built.
It’s all too common to design, and maybe even build, an assembly station “the way we always have” and then tack on process monitoring as an afterthought. In many cases, an innovative assembly engineer would cobble together a homemade science project solution. Sometimes they even worked. But, when the engineer moved on to his next project, no one could support, enhance or repair the science project.
As you might expect, the usual result of this approach is sub-optimal performance in detecting bad assemblies. Even worse, it virtually eliminates the possibility of improving the process by using data collected during the process. This data could be used to improve the process by adjusting it in real time.
It requires direct intent and planning.
Planning Steps
- Developing a clear definition of what constitutes an assembly that is okay to move to the next station.
- Determining what type of attribute it is and how to measure it in the station:
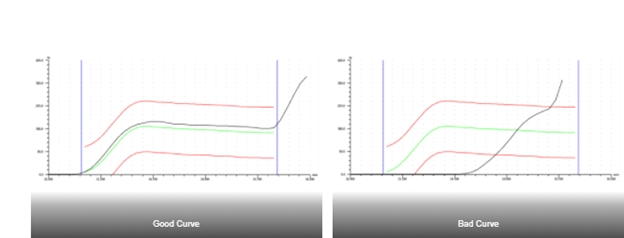
- A Process Attribute: A common example is found in a press fit operation where the force required to press the parts together is a clear and important parameter in determining a good or bad assembly. The force/position signature can determine that the press fit interference was proper and detect damaged or cracked parts, dirty parts, proper or improper lubrication and many other defects. An end of line test station is not capable of detecting any of these.
- A Part Attribute: The most common example is a physical dimension. If a part attribute has to be measured in the station that capability must be designed into the station as a primary task. It absolutely cannot be tacked on as an afterthought.
This kind of data can be used to pass or fail the part. But, even more importantly, it can be used to adapt and adjust the process on the fly to make a better part every time.

Automotive Application
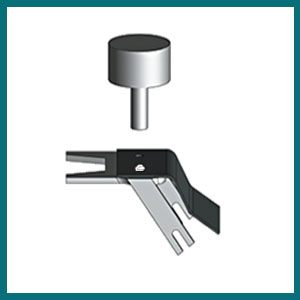
For example, an automotive hood latch is a relatively simple device consisting of a latch, a bracket and a spring. The latch and bracket are typically riveted together. For many years it was done with an air or hydraulic press that simply smashed the rivet to a mechanical stop. Testing consisted of an operator at the end of the line wiggling the latch manually.
Problem
While it’s a simple part, a hood latch that is too stiff or too loose can directly affect customer satisfaction with the entire vehicle.
Process variables that have to be controlled to achieve consistent performance:
- Size and hardness of the rivet
- Size of the bracket and latch holes
- Thickness of the two components.
Solution
By replacing the air or hydraulic press with an instrumented electro-mechanical servo press, all of those variables can be detected and compensated for during the actual assembly operation. The press can gauge the height of the latch, press or spin the rivet at a controlled “press to force” which compensates for the hardness variable and based on the latch height, press to a precise location without any mechanical stops.

The manufacturer can take that a step further by adding a motorized torque system to automatically pivot the assembly, while it’s being riveted. Such a system will produce hood latches with essentially identical operational force requirements leading directly to more satisfied customers.
All of the components required for such a system are on the shelf today. In fact, the principles involved are being applied to the assembly of control arms, ball joints, transmission parts, wheel studs, and literally hundreds of other automotive components.
Industry 4.0
Such intelligent assembly systems will play a key role in the global transition to Industry 4.0. The fourth industrial revolution with its emphasis on decentralized manufacturing enabled by networked machines communicating via the Internet will increasingly depend on data-driven assembly systems to meet the global market’s requirements for ever higher levels of productivity and quality.
The tools required to make that happen exists today. The technology required to put them to work exists today. The innovative engineers required to marry the tools with the technology and put the resulting systems in place are at work today.
Whether it’s called “No Fault Forward” or some as yet unknown future buzzword, the results will be the same. More consistent products, reduced manufacturing costs and more satisfied customers. It’s time to make it happen.
